My Blinkie

Blogs I Love


"My Favorite Forums"


Popular Posts
-
 This tutorial is my own “ Linda Atkins aka Lynx the Minx Designs” any resemblance to any other, is only coincidence and not intentional....
 -
 To download click Preview above. Please do not share this kit, if wanting to share please share the link to it. Please read my T...
 -
 This tutorial is my own “ Linda Atkins aka Lynx the Minx Designs” any resemblance to any other, is only coincidence and not intentional. I a...
 -
 This tutorial is my own creation, any resemblance to any other, is only coincidence and not intentional. I am using PSP Ult...
 -
 You are welcome to use my Mask, but please do not change the file name. If sharing, please just share this link https://lynxtuts.blogs...
 -
 This tutorial is my own “ Linda Atkins aka Lynx” Creation, any resemblance to any other, is only coincidence and not intenti...
 -
 I have a new Freebie Kit for you, I know it has been awhile, thought it was time to wake everyone up with a Freebie Please Read TOU be f...
 -
 To download click Preview above. Please do not share this kit, if wanting to share please share the link to it. Please read my TOU...
 -
 You are welcome to use my Snags, Templates, Mask or Brushes. If sharing please do not share this file, please use my link instead http...
 -
 This tutorial is my own creations, any resemblance to any other, is only coincidence and not intentional. I am using PSP X9...
CU License

CU License

CU License

CU4CU Tube License

CUCU License

Free DAD CU License

LTMCreation Free CU License

Free CU License


This
tutorial is my own
“Linda
Atkins aka Lynx the Minx Designs”
any resemblance to any
other,
is only coincidence and not intentional.
I am using PSP
2022 Ultimate
This should work with any other PSP/Corel.
Written:
05.13.22
..........................................
I
am using a PTU kit called “Steampunk Days”
by me “Lynx the
Minx”
You can find it at these store
“Secret
Garden Designs”,
“Picsfordesign”
or “Elegancefly”
Font
of choice,
I am using “Skyliner”
Mask
of choice
I am using “Mask 178”
From “Zombie
Graphics”
You can find it “Here”
You
will need filter
“Xero”
Drop
Shadow
Vertical:1 Horizontal:1 – Opacity: 50 – Blur: 5
Let's get started …
Open
LTM_pp3
Duplicate
Close Original
Layers
Load/Save
Mask - Load Mask From Disk
Layers - Merge Group
Merge Down
Add
Elements, Tube and Wordart
I added Tube – Resized it to 563x822
pixels
Add LTM_chain2 – Resize 30%
Duplicate
Tube
Move chain between the to tubes,
move it to were it
should be in the hand
Highlight the top tube
Using your Eraser
Tool – size 32%
Erase the hand so it looks like she is
holding the heart chain in her hand
Merge Down, Merge Down
so
you have the 2 tubes and the heart chain merged together
In front of Tube
LTM_DC_04
– Resize 136x150
LTM_HFP_4 – Resize 75%
LTM_FC_flowers2 –
Resize 75%
LTM_HFP_1 – Resize 75%
LTM_Mask – Resize
25%
LTM_WITWRoxy2 – Resize 50%
Behind Tube
LTM_PG_word
(Move to the top of tag)
LTM_clock3 – Resize 75%
LTM_suitcases
– Resize 50%
LTM_LLD_Tube01 – Resize 65%
LTM_MD_1 –
Resize 35%
Merge Visible
Effects
Xero/Porcelain
Highlight
Your tube layer
Layers – New Raster layer
Add your copyright
information
Merge Down
Image – Resize 500 x 500 pixels
Adjust
– Sharpness – Sharpen
Now add your name
Save as png.
~~~~~~~~
Now
for your AVI
I am using LTM_hat – Resize 150 longest side
Now
open a new image 150x150
Copy LTM_hat
Paste to the new image
now add your name or initial
~~~~~~~~
Hope
you enjoyed the tutorial,
♥ Would
love to see your results ♥


This tutorial is my own
“Linda Atkins aka Lynx the Minx Designs”
any resemblance to any other,
is only coincidence and not intentional.
I am using PSP 2022 Ultimate
This should work with any other PSP/Corel.
Written: 05.06.22
..........................................
I am using a PTU kit called “Mom's Day”
by me “Lynx the Minx”
You can find it at these store “Secret Garden Designs”,
and “Picsfordesign”
Font of choice,
I am using “You Are Love”
Mask of choice
I am using “Lynx-Mask13 ”
You can find it “Here”
You will need filter
“Xero”
Drop Shadow
Vertical:1 Horizontal:1 – Opacity: 50 – Blur: 5
Let's get started …
Open LTM_ccd_paper3
Duplicate
Close Original
Flip the paper
Layers
Load/Save Mask - Load Mask From Disk
Layers - Merge Group
Merge Down
Add Elements, Tube and Wordart
I added Tube – Resized it to 725
In front of Tube
LTM_ccd_puppy2 – Resize 65%
LTM_md_element01 – Resize 60%
LTM_md_element02 – Resize 60%
LTM_md_element22 – Resize 55%
Behind Tube
LTM_md_wordart2 – Resize 80%
LTM_md_element07 – Resize 60%
LTM_md_element17 – Resize 60%
LTM_md_element03 – Resize 55%
LTM_md_element49 – Resize 60%
Merge Visible
Effects
Xero/Porcelain
Highlight Your tube layer
Layers – New Raster layer
Add your copyright information
Merge Down
Image – Resize 500 x 500 pixels
Adjust – Sharpness – Sharpen
Now add your name
Save as png.
~~~~~~~~
Now for your AVI
I am using LTM_md_element07 – Resize 150 longest side
Now open a new image 150x150
Copy LTM_md_element07
Paste to the new image now add your name or initial
~~~~~~~~
Hope you enjoyed the tutorial,
♥ Would love to see your results ♥
.png)
.png)

“Linda Atkins aka Lynx the Minx Designs”
any resemblance to any other,
is only coincidence and not intentional.
I am using PSP 2022 Ultimate
This should work with any other PSP/Corel.
Written: 04.09.22
..........................................
I am using a PTU kit called “Spring Fantasy”
by me “Lynx the Minx”
You can find at these stores
“Elegancefly” and “Picsfordesign”
Font of choice,
I am using “Teach Demo Regular”
Mask of choice
I am using “Lynx-Mask13 ”
You can find it “Here”
You will need filter
“Xero”
Drop Shadow
Vertical:3 Horizontal:2 – Opacity: 80 – Blur: 10.00
I only used this DS on the Tube and LTM_springfantasy_ele57 and
LTM_springfantasy_ele34 and LTM_springfantasy_ele27
LTM_springfantasy_ele27
LTM_springfantasy_ele26
Lets get started …
Open LTM_sf_paper2
Duplicate
Close Original
Layers
Load/Save Mask - Load Mask From Disk
Layers - Merge Group
Merge Down
Add Elements and Tube
LTM_springfantasy_ele14 – Resize 350x350 pixels
LTM_WITWASCUClouds4 – Resize 75%
LTM_ccd_element2 – 85%
I changed the color on LTM_ccd_element2
Adjust/Hue-Saturation/Colorize
Hue-189 Saturation-128
LTM_ccd_tree – Resize 90%
LTM_CD-Home Sweet Home Elements (4) – Resize 70%
LTM_ccd_grass1(1)
Merge Visible
Add Tube
I resized mine to 568x784 pixels
LTM_PG_6 – Resize 50%
LTM_springfantasy_ele22 – Resize 65%
LTM_springfantasy_ele34 – Resize 75%
Duplicate – Image – Mirror
LTM_LMB_DreamerPack1_Elements(3) – Resize 50%
LTM_springfantasy_ele57 – Resize 40%
LTM_springfantasy_ele27 - Resize 50%
I changed the color on LTM_ccd_element27
Adjust/Hue-Saturation/Colorize
Hue-189 Saturation-128
LTM_springfantasy_ele26 - Resize 50%
I changed the color on LTM_ccd_element26
Adjust/Hue-Saturation/Colorize
Hue-189 Saturation-128
Merge Visible
Effects
Xero/Porcelain
Highlight Your tube layer
Layers – New Raster layer
Add your copyright information
Merge Down
Image – Resize 500 x 500 pixels
Adjust – Sharpness – Sharpen
Now add your name
Save as png.
Hope you enjoyed the tutorial,
♥ Would love to see your results ♥


This tutorial is my own
“Linda Atkins aka Lynx the Minx Designs”,
any resemblance to any other,
is only coincidence and not intentional.
I am using PSP 2022 Ultimate
This should work with any other PSP/Corel.
Written: 03.29.22
..........................................
For this Tutorial I am using the Artwork of
You can find the tube in my PTU Kit
You
must have a license with one of the store that
I sell at.
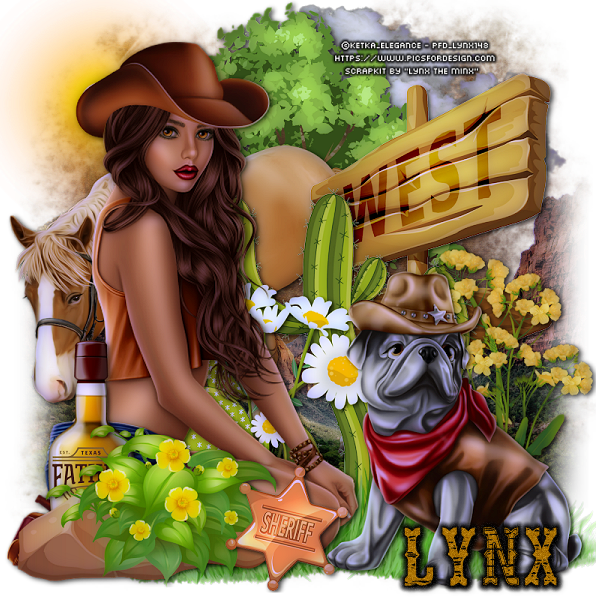
I am using a PTU kit called “Wild West”
by Designer “Lynx the Minx”
You will be able to purchase it at
“Secret Garden Designs”, “Elegancefly” or “Picsfordesign”
Font of choice,
I am using “Hells Rider Decay”
Mask of choice
I am using “Lynx-Mask 11 ”
You can find it “HERE”
You will need filter
“Xero”
Drop Shadow
Vertical: 3 Horizontal: 2 – Opacity: 80– Blur: 10.00
This DS though out this tutorial
Lets get started …
Open LTM_DC_CU Western Background (5)
Duplicate
Close Original
Layers
Load/Save Mask - Load Mask From Disk
Layers - Merge Group
Merge Down
Add Elements and Tube
Resize Elements and Tube to your liking.
I resized my tube to 468 x 700 pixels
Behind tube
LTM_ww_element51
Duplicate and move to the other side
LTM_ww_Element81 – Resize 85%
LTM_ww_Element85 – Resize 65%
LTM_ww_element87
LTM_ww_element72
Use your Selection Tool – Feather set at 50%
on each side ST and delete.
LTM_ww_element48
LTM_LTB_Bonus2 – Resize 75%
LTM_ww_Element89
In front of tube
LTM_ww_Element64 – Resize 65%
LTM_CD_Cowboy Set Elements (28) – Resize 85%
LTM_ww_Element08 – Resize 50%
LTM_ww_Element92 – Resize 65%
LTM_ww_Element96 – Resize 65%
Merge Visible
Effects
Xero/Porcelain
Highlight Your tube layer
Layers – New Raster layer
Add your copyright information
Merge Down
Image – Resize 500 x 500 pixels
Adjust – Sharpness – Sharpen
Now add your name
Save as png.
Now if you want to made a Avi.
Open new image
150x150
Copy tube paste onto the new image
move until you have it the way you want it.
New Layer – Pick a color from your tag.
Flood fill
Selections – Modify – Contract 2%
Delete – Add Drop Shadow -
Add Drop Shadow again – on Vertical and Horizontal
Now add copyright
Hope you enjoyed the tutorial,
♥ Would love to see your results ♥


This tutorial is my own
“Linda Atkins aka Lynx” Creation,
any resemblance to any other,
is only coincidence and not intentional.
I am using PSP 2022 Ultimate
This should work with any other PSP/Corel.
Written: 03.12.22
..........................................
For this Tutorial I am using the Artwork of
“©Jenny”
You can find the tube in my PTU Kit
You
must have a license with one of the store that
I sell at.
I am using a PTU kit called “Easter Sunday”
by Designer “Lynx the Minx”
You will be able to purchase it at
“Secret Garden Designs”, “Elegancefly” or “Picfordesign”
Font of choice,
I am using “Easter Sunday”
Mask of choice
I am using “Lynx-Mask 13 ”
You can find it “HERE”
You will need filter
“Xero”
Drop Shadow
Vertical & Horizontal: 1 – Opacity: 75 – Blur: 2.00
This DS though out this tutorial
Lets get started …
Open LTM_DC_30_pp
Duplicate
Close Original
Layers
Load/Save Mask - Load Mask From Disk
Layers - Merge Group
Merge Down
Add Elements and Tube
Resize Elements and Tube to your liking.
I resized my tube to 446 x 746 pixels
Behind tube
LTM_es_element11 – Resize 65%
LTM_es_element10 – Resize 65%
LTM_DC_17
LTM_PGD_30 – Resize 65%
LTM_es_element30 – Resize 75%
Duplicate – Image – Mirror
LTM_PGD_4 – Resize 65%
In front of tube
LTM_es_element21 – resize 50%
LTM_ccd_gnome2 – Resize 65%
LTM_ccd_flower4 – Resize 65%
LTM_ccd_flower5 – Resize 50%
LTM_DC_Tamara_CU265_1 – Resize 65%
LTM_PGD_48
LTM_PC_Rabbit3 – resize 65%
LTM_es_element17 – resize 75%
Merge Visible
Effects
Xero/Porcelain
Highlight Your tube layer
Layers – New Raster layer
Add your copyright information
Merge Down
Image – Resize 500 x 500 pixels
Adjust – Sharpness – Sharpen
Now add your name
Save as png.
Now if you want to made a Avi.
Open new image
150x150
Copy tube paste onto the new image
move until you have it the way you want it.
New Layer – Pick a color from your tag.
Flood fill
Selections – Modify – Contract 2%
Delete – Add Drop Shadow -
Add Drop Shadow again – on Vertical and Horizontal
Now add copyright
Hope you enjoyed the tutorial,
♥ Would love to see your results ♥
*************************


This tutorial is my own
“Lynx the Minx”,
any resemblance to any other,
is only coincidence and not intentional.
I am using PSP Ultimate 2020
This should work with any other PSP/Corel.
Written: 03.13.21
..........................................
For this Tutorial
I am using a PTU Kit called “Luck of the Irish”
By myself “Lynx the Minx Designs”,
The Tube I am using comes with the kit,
it is by ©Attila
You can purchase this kit from these stores
Mask of choice
I am using “StPatsMask1ByTonya”
It should be “Here”
The Animation I am using is FTU by “Sophisticat Simone”
Animation 315
Filter to use “Xero”
Font of choice
I am using “Patrick”
Drop Shadow
Vertical & Horizontal: 2 – Opacity: 75 – Blur: 2.00
This DS though out this tutorial
Lets get started …
New Image 1200x1200 Pixels
Resolutions: 96,000
Color: #ffffff
Open LTM_luckyoftheirish_pp3
copy – paste as new layer on new image
Add Mask
“StPatsMask1byTonya”
You can find “Here”,
Not sure which Mask Package it is.
Layers
Load/Save Mask - Load Mask From Disk
Layers - Merge Group
Add Elements
LTM_ccd_BarrelFrame1 – Resize 75%
LTM_pdc_LLM1_10 – move to the left
LTM_pdc_LLM107(2)
LTM_ccd_Harp3 - move to right
LTM_ccd_Flower1
Duplicate
Image/Mirror
Merge Down
add tube
LTM_ccd_StPatEva6ATTube
I resized mine to 630 x 800
You can resize to your liking
LTM_ccd_bag1 – Resize 50% (2 times)
LTM_ccd_bottom1 – Resize 45%
LTM_ccd_bottom2 – Resize 45%
LTM_pdc_LLM1_10(2) – move to the right
Merge Visible
Effects
Xero/Porcelain
Default Setting
Layers
New Raster Layer
Add Copyright Information
Resize to your liking
Merge Down
LTM_ccd_BarrelFrame1, Mask and background
Close this out
Merge Visible The rest
Reopen background
Lets Animate
Copy background
Open Animation Shop
Paste as new Animation
Duplicate until you have 18 frames
Open SS Ani. #315
Resize 383 x 400 Pixels
Animation/Cull Animation
Remove 1 Frames every 2 frames
35 Candidate frames
17 frames will be remove by this operation
18 frames will remain after this operation
Select All
Copy(ctrl+a+c)
Back to your background
Select All paste (ctrl+a+e)
Back to Corel/PSP
Copy the top portion
Back to Animation Shop
Duplicate until you have 18 frames
Copy/Paste into selected frames
Now add your name
Save as Gif
Hope you enjoyed the tutorial,
♥ Would love to see your results ♥

I'm Protected
Award

Award

Creative Fabrica

"The Zone Group Award"

Designer and Creative Team Manager
CU License

Free CU License

Free CU License
